Titan Board BSP Description
English | Chinese
Introduction
This document provides the BSP (Board Support Package) description for the RT-Thread Titan Board development board. By reading the Quick Start section, developers can quickly get started with this BSP and run RT-Thread on the development board.
The main contents are as follows:
Introduction to the development board
BSP Quick Start Guide
Development Board Introduction
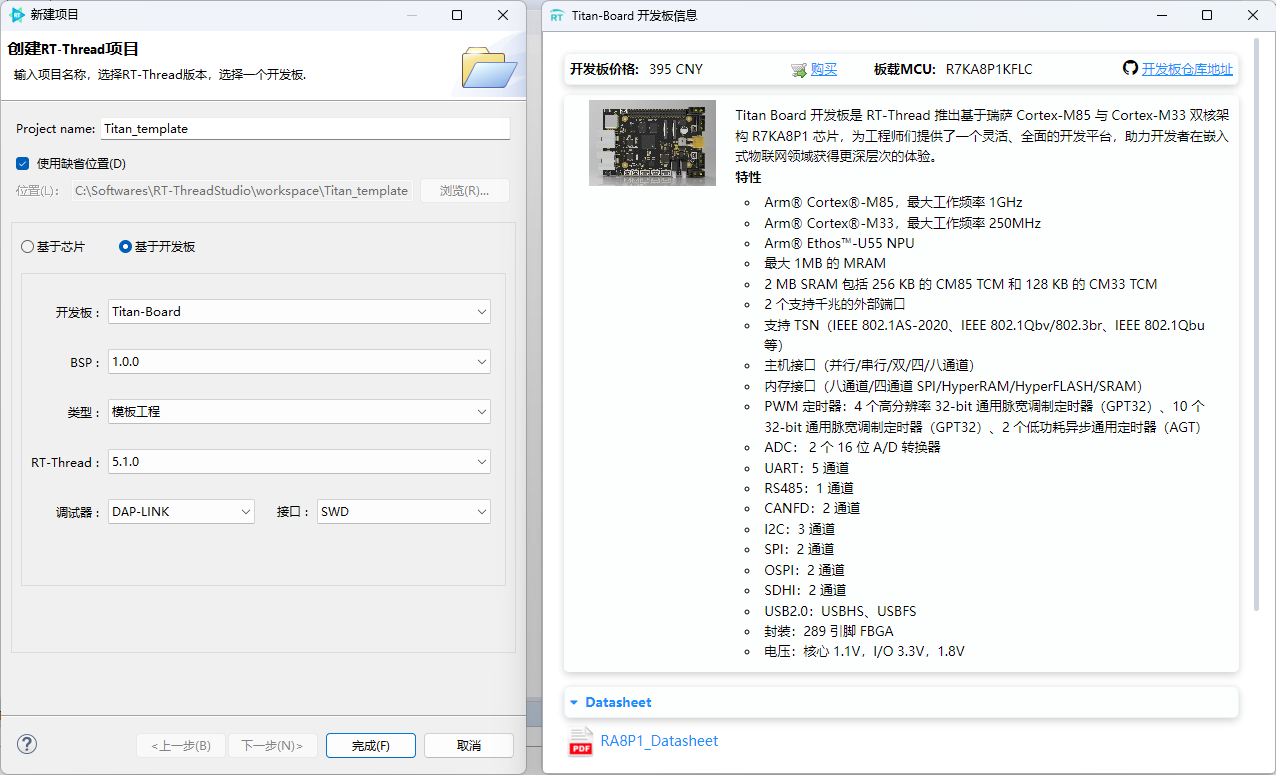
The Titan Board development board is based on the Renesas RA8P1 and is designed for embedded system application development through flexible configuration of software packages and IDEs.
The front view of the development board is shown below:
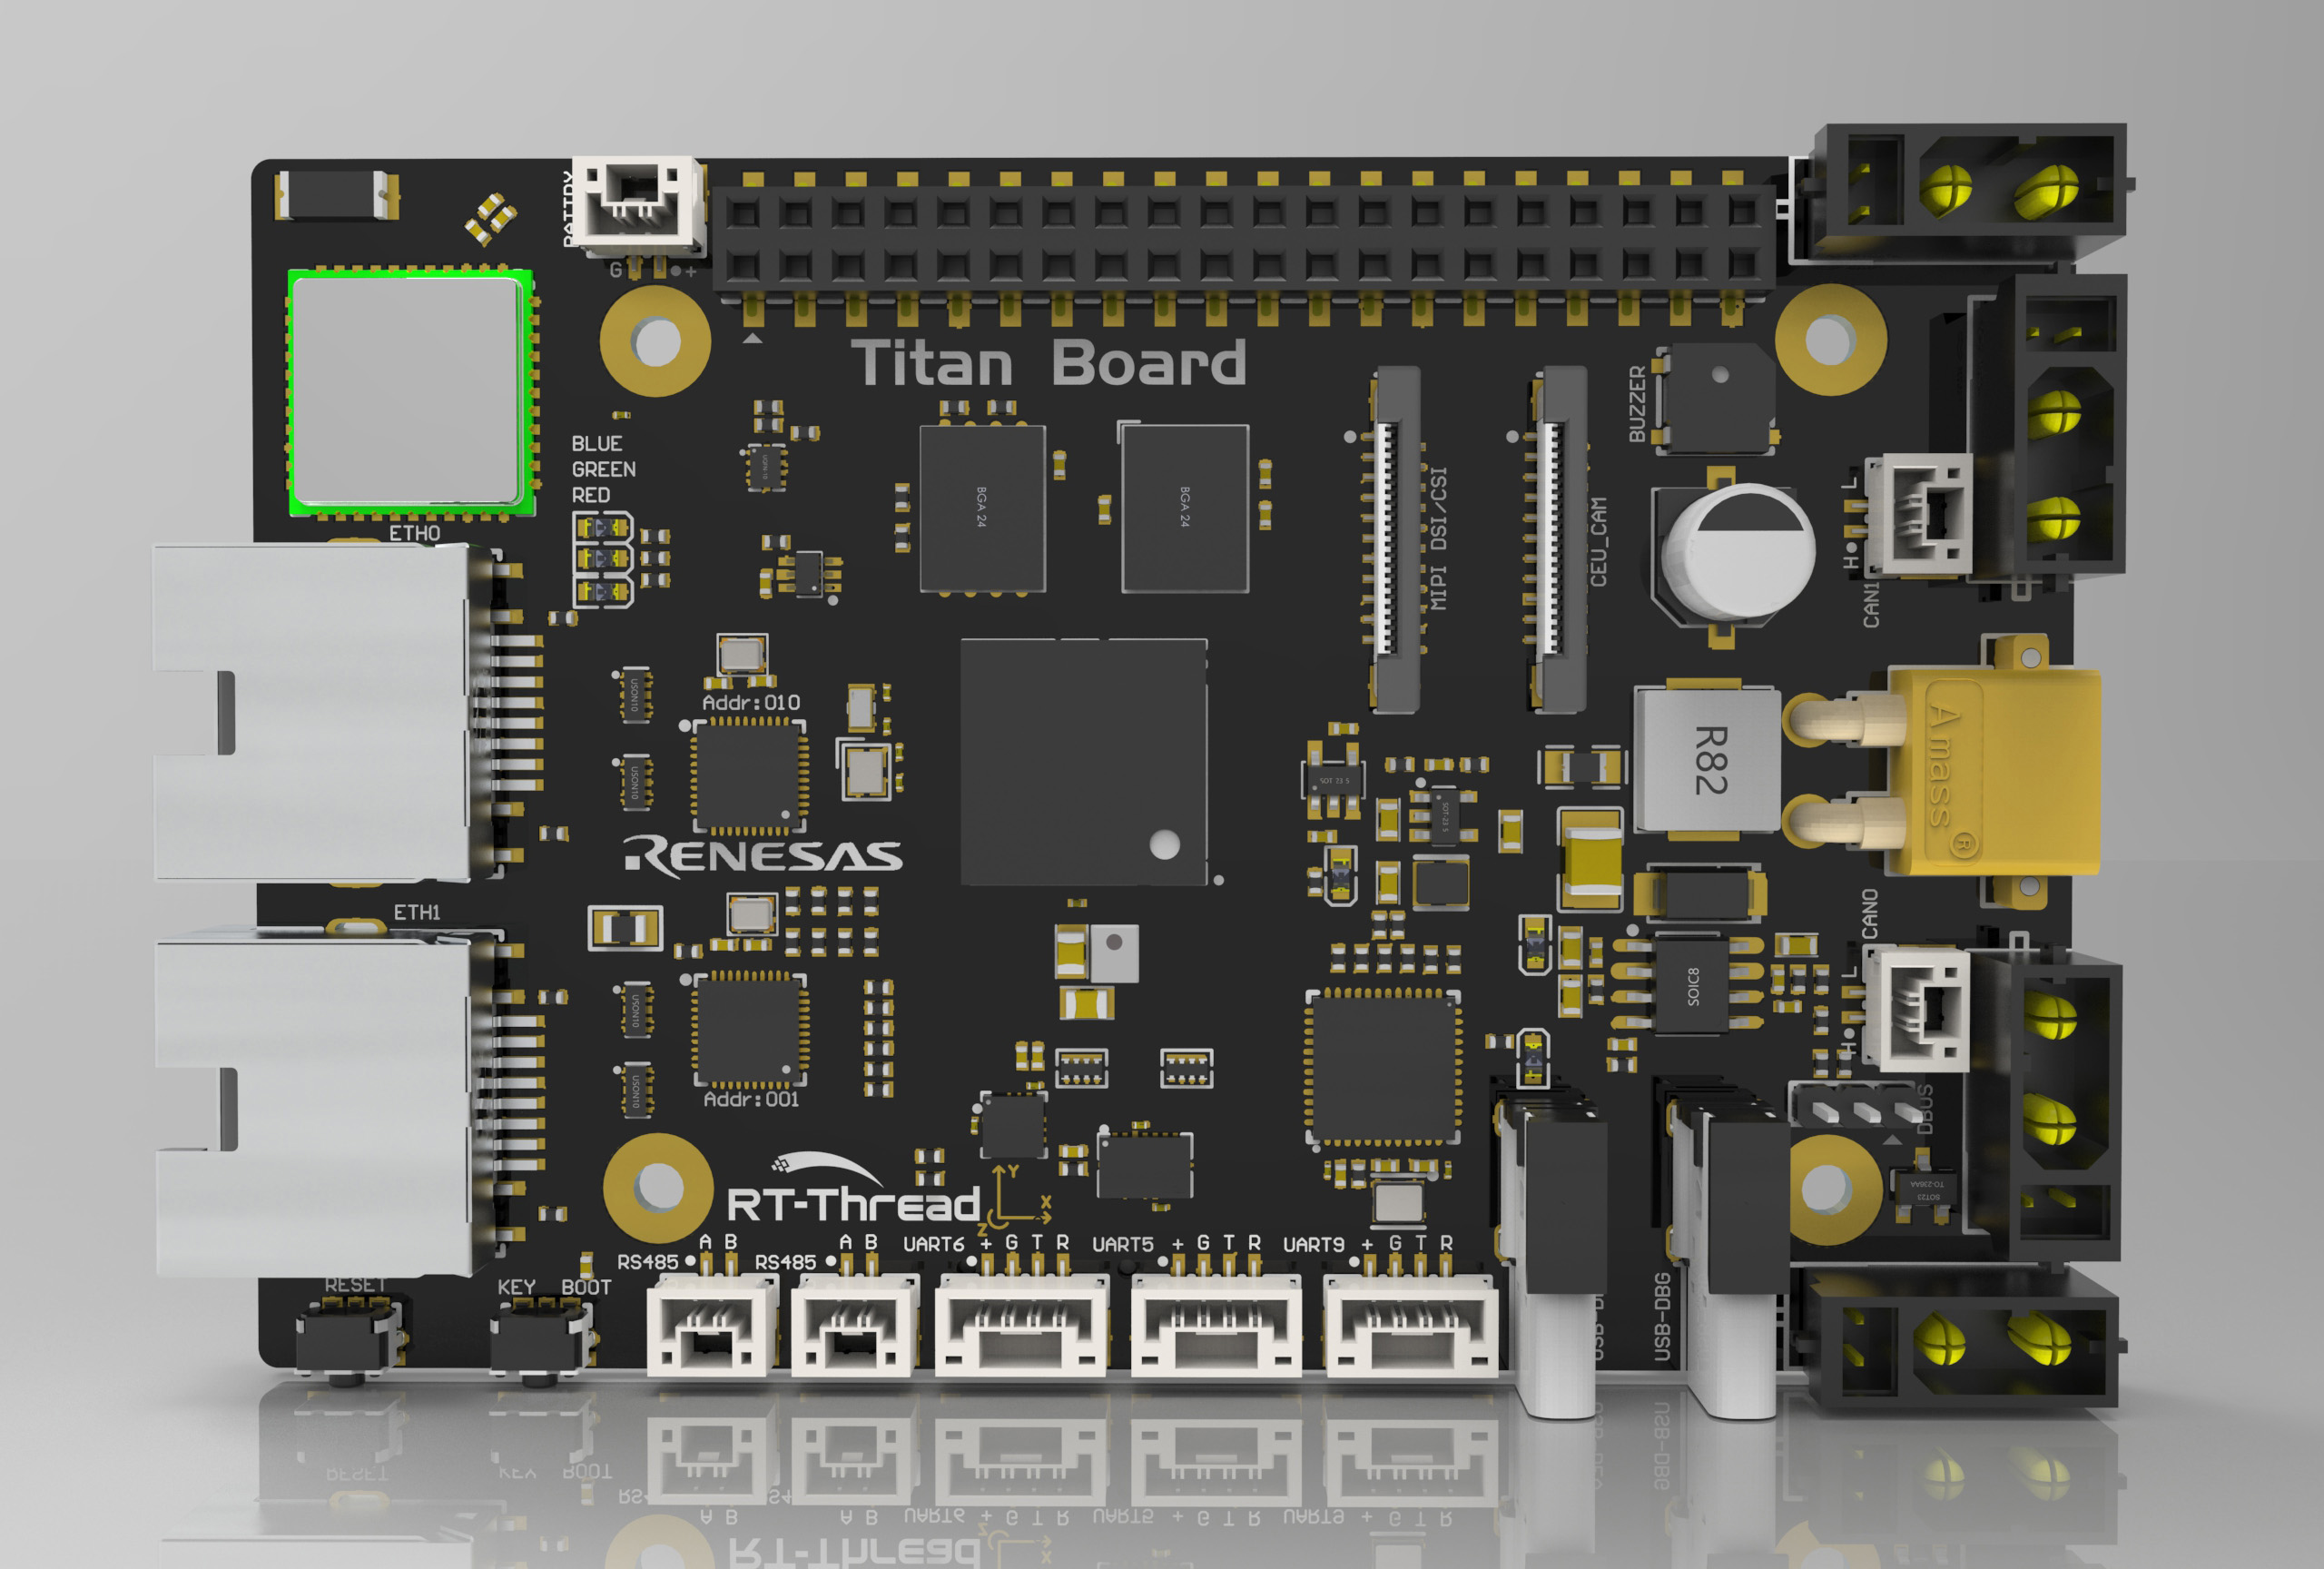
The commonly used on-board resources of this development board are as follows:
MCU: R7KA8P1KFLCAC, high-performance dual-core with 1GHz Arm® Cortex®-M85 and 250MHz Arm® Cortex®-M33, 1MB code MRAM, and 2MB ECC-enabled SRAM.
Debug interface: On-board DAP-Link interface
Board interfaces: 40-pin Raspberry Pi interface, MIPI DSI/CSI, CEU Camera, RGB LCD interface, 2 Ethernet interfaces, 4 CAN motor interfaces, 2 RS485 interfaces, 3 UARTs, 1 DBUS interface, 1 USBHS/USBFS interface, 1 RTC battery interface.
Peripheral Support
The current peripheral support status in this BSP is as follows:
On-chip Peripheral |
Support Status |
Component |
Support Status |
|---|---|---|---|
UART |
Supported |
LWIP |
Supported |
GPIO |
Supported |
TCP/UDP |
Supported |
HWTIMER |
Supported |
MQTT |
Supported |
I2C |
Supported |
TFTP |
Supported |
WDT |
Supported |
Telnet |
Supported |
RTC |
Supported |
Multicore Communication |
Support Status |
ADC |
Supported |
RPMsg-Lite |
Supported |
DAC |
Supported |
Extended peripheral |
Support Status |
SPI |
Supported |
MIPI CSI Camera |
Supported |
RS485 |
Supported |
CEU Camera |
Supported |
CANFD |
Supported |
RGB LCD |
Supported |
SDHI |
Supported |
CYW43438 WIFI |
Supported |
USB |
Supported |
||
HyperRAM |
Supported |
||
HyperFlash |
Supported |
User Guide
The user guide is divided into the following two sections:
Quick Start
This section is intended for beginners who are just getting started with RT-Thread. By following simple steps, you can run the RT-Thread operating system on this development board and observe the experimental results.
Advanced Usage
This section is intended for developers who need to use more board resources on the RT-Thread operating system. By using the FSP and RT-Thread Settings tools to configure the project, more on-board resources can be enabled to achieve advanced functionality.
Quick Start
This BSP currently provides an RT-Thread Studio project. Below, we use the RT-Thread Studio development environment as an example to illustrate how to get the system running.
Create a Project
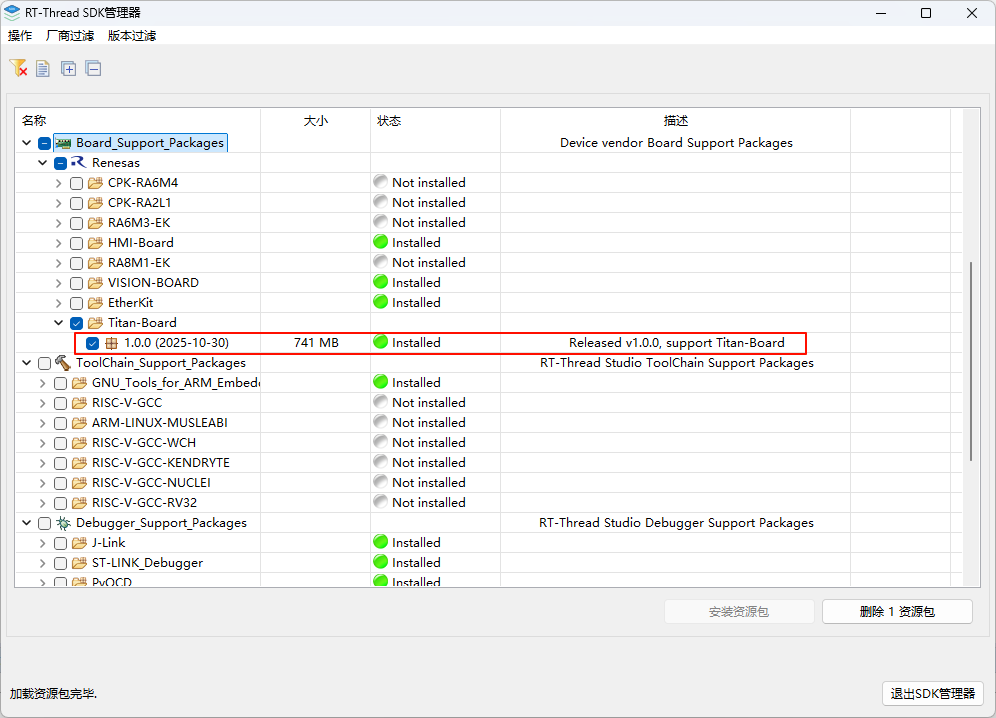
Download the Titan Board SDK resource package.
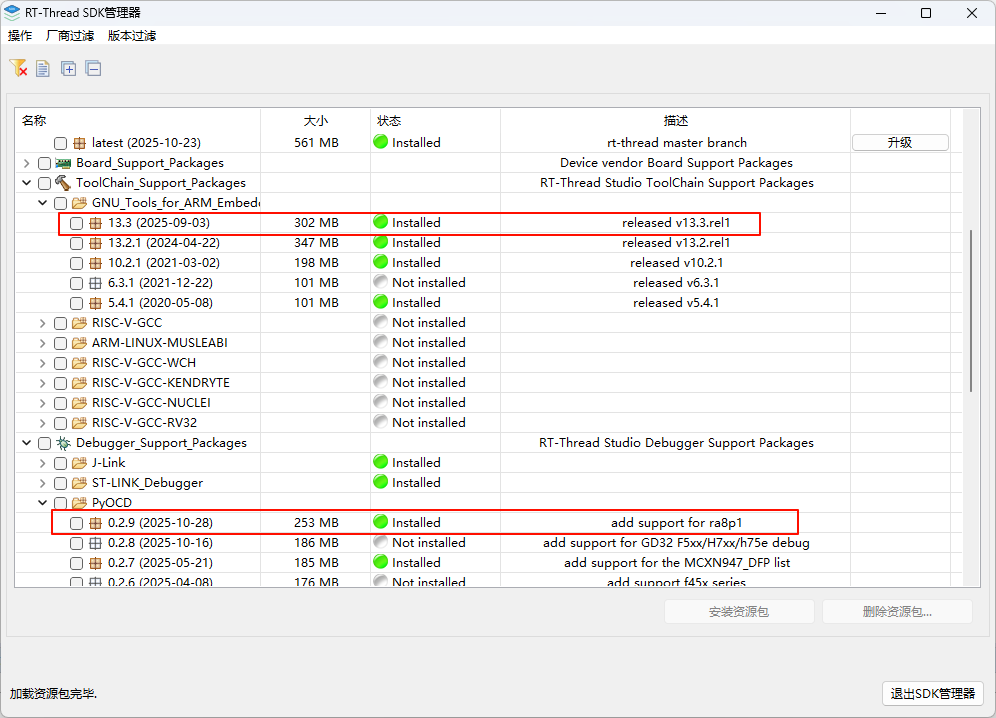
Download the compilation toolchain and debugging tools.
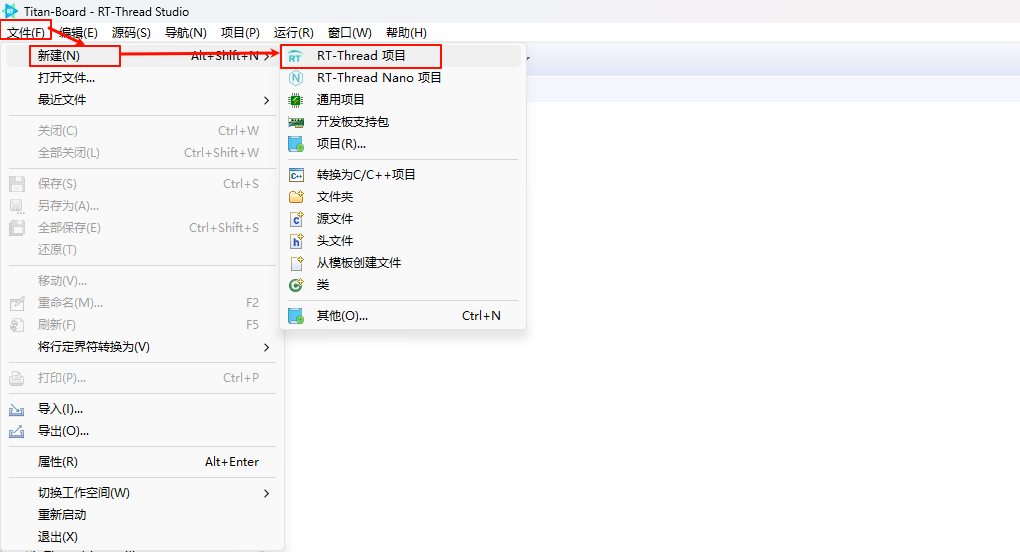
Create a new RT-Thread project.
Hardware Connection
Use a USB cable to connect the development board to the PC, and use the DAP-Link interface to download and debug the program.
Build and Download
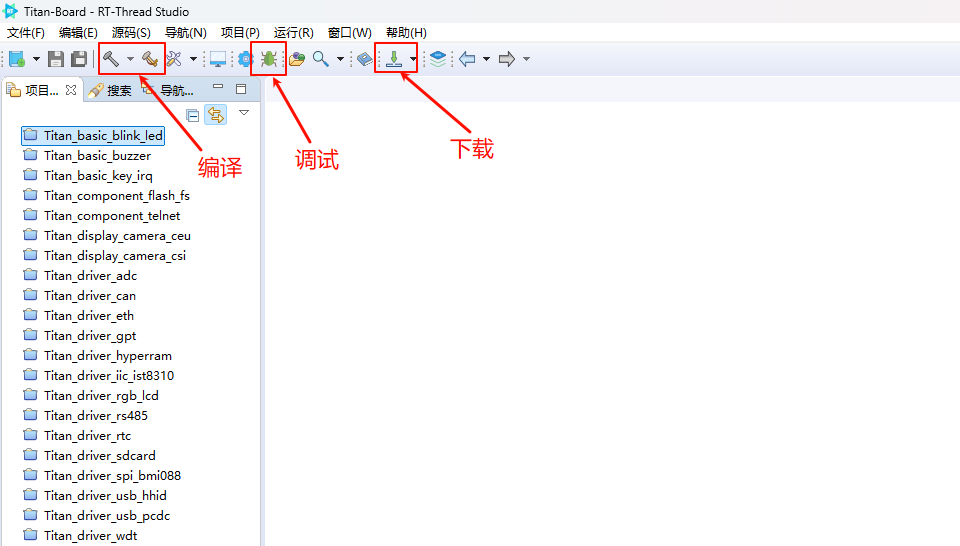
View Running Results
After the program is successfully downloaded, the system will automatically run and print system information.
Connect the development board’s corresponding serial port to the PC, open the corresponding serial port in a terminal tool (115200-8-1-N), and reset the device. You will then see the RT-Thread output information. Enter the help command to view the commands supported in the system.
 \ | /
- RT -     Thread Operating System
 / | \     5.1.0 build Aug 5 2025 17:24:30
 2006 - 2024 Copyright by RT-Thread team

==================================================
Hello, Titan Board!
==================================================
msh >ps
thread       pri  status      sp     stack size max used left tick   error  tcb addr
------------ ---  ------- ---------- ----------  ------  ---------- ------- ----------
tshell        20  running 0x000000cc 0x00001000    16%   0x0000000a OK      0x22022568
sys workq     23  suspend 0x000000c4 0x00000800    11%   0x0000000a OK      0x22021a60
tidle0        31  ready   0x000000a4 0x00000100    67%   0x00000011 OK      0x220203c8
timer          4  suspend 0x000000a4 0x00000200    38%   0x00000009 EINTRPT 0x22020818
main          10  suspend 0x000000dc 0x00000800    18%   0x00000007 EINTRPT 0x22021128
msh >
Application Entry Function
The entry function of the application layer is located in src\hal_entry.c within void hal_entry(void). User-created source files can be placed directly in the src directory.
void hal_entry(void)
{
    rt_kprintf("\n==================================================\n");
    rt_kprintf("Hello, Titan Board!\n");
    rt_kprintf("==================================================\n");

    while (1)
    {
        rt_pin_write(LED_PIN_0, PIN_HIGH);
        rt_thread_mdelay(1000);
        rt_pin_write(LED_PIN_0, PIN_LOW);
        rt_thread_mdelay(1000);
    }
}
The FSP of the Titan_template project has already pre-configured the following peripherals. Users can refer to the FSP configuration instructions below to generate their own setup.
Uart8、Uart5、Uart9
HyperFlash
HyperRAM
timer0、timer1
SD Card
SDIO WiFi
I2C0、I2C2
SPI0
MIPI CSI
RGB565 LCD
ETH1
pwm2、pwm7、pwm10、pwm12
CAN0、CAN1
RTC
ADC0
Advanced Usage
Resources and Documentation
FSP Configuration
If you need to modify the Renesas BSP peripheral configuration or add new peripheral interfaces, you will need to use the Renesas Flexible Software Package (FSP) configuration tool. Please make sure to follow the steps below for configuration. If you encounter any issues, you may ask questions in the RT-Thread Community Forum.
Download Flexible Software Package (FSP) | Renesas, please use FSP version 6.0.0
Refer to the documentation: Configuring Peripheral Drivers Using FSP for the RA Series.
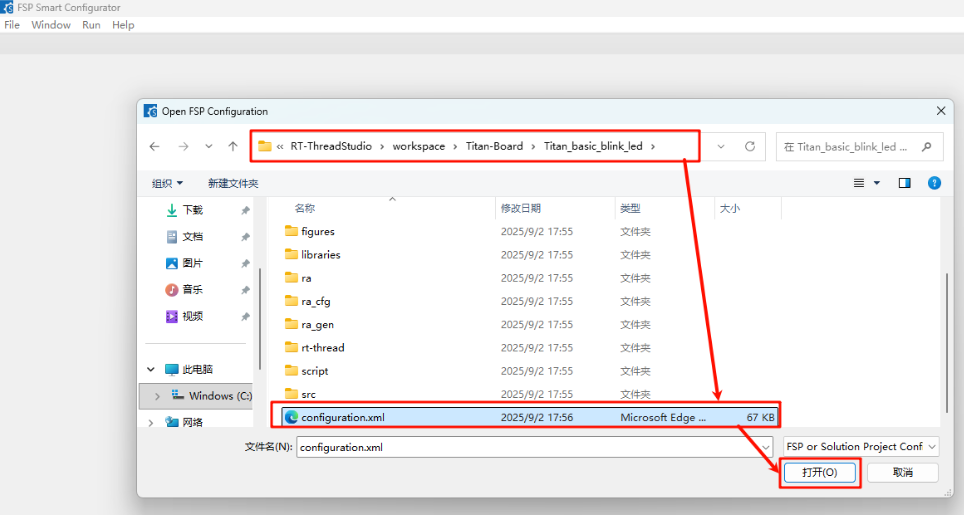
Method 1: Configure development by importing FSP:
Users can locate the configuration.xml file in the project and import it into FSP to start configuration:
Select File → Open at the top-left corner to open the configuration file.
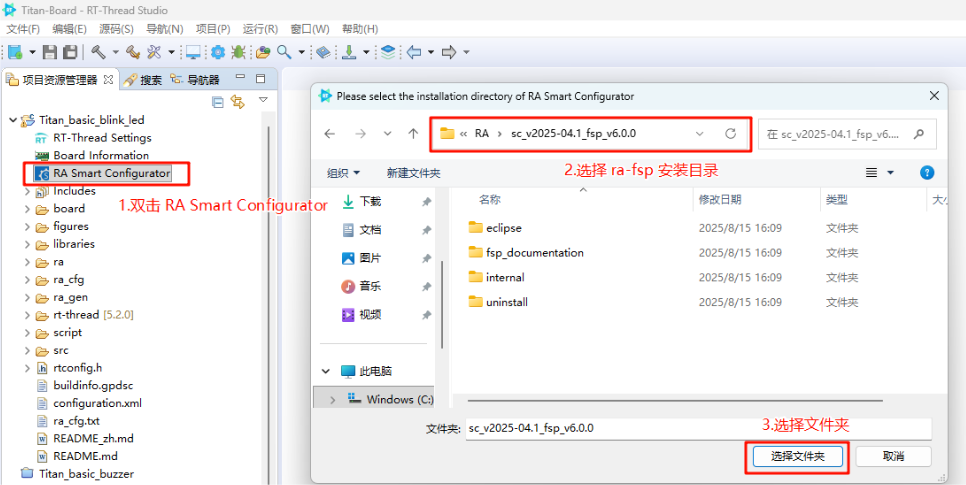
Method 2: Configure FSP using built-in commands in RT-Thread Studio:
After installing RA-FSP, first create a Titan Board project in Studio. Under the project, you will see the built-in Renesas FSP configuration option: RA Smart Configurator.
Double-click this option, then locate the root directory where RA-FSP was installed, and set this directory as the FSP installation path.
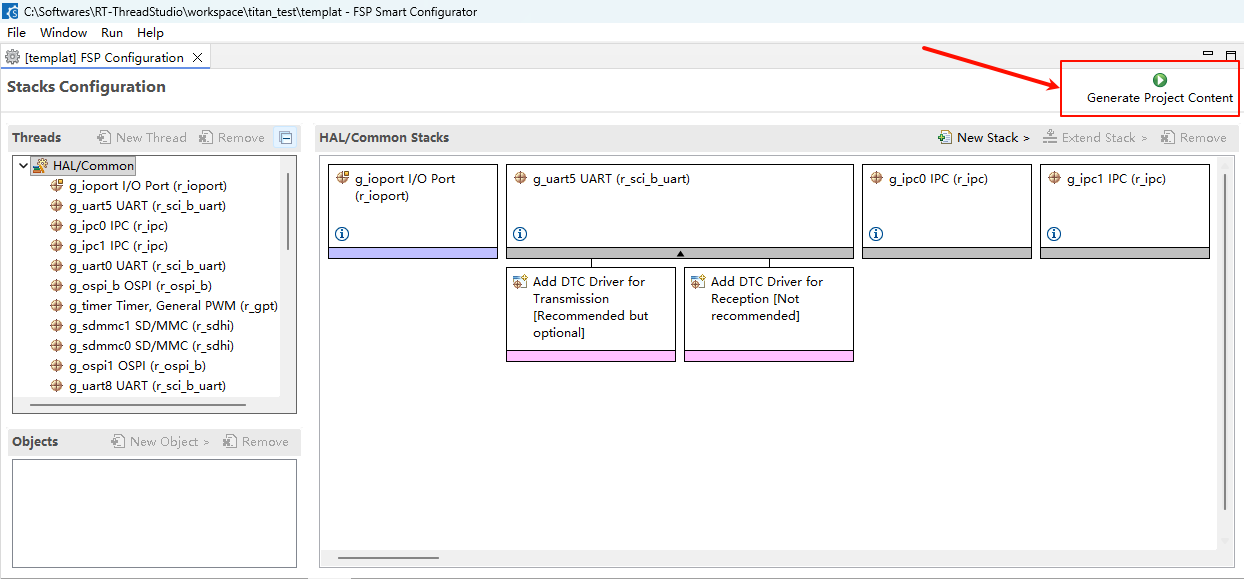
Generate FSP Code:
RT-Thread Settings
In RT-Thread Settings, you can configure the RT-Thread kernel, components, software packages, and Titan Board device drivers.

Contact Information
If you have any thoughts or suggestions during usage, please feel free to contact us via the RT-Thread Community Forum.
Contribute Code
If you’re interested in Titan Board and have some exciting projects you’d like to share, we welcome code contributions. Please refer to How to Contribute to RT-Thread Code.