Edgi-Talk_M55_MIPI_LCD Example Project
中文 | English
Introduction
This example project runs on the M55 application core with RT-Thread RTOS, demonstrating MIPI LCD screen refresh functionality. It allows users to quickly validate the MIPI DSI interface driver and LCD initialization, providing a reference for future GUI applications or LVGL porting.
Hardware Description
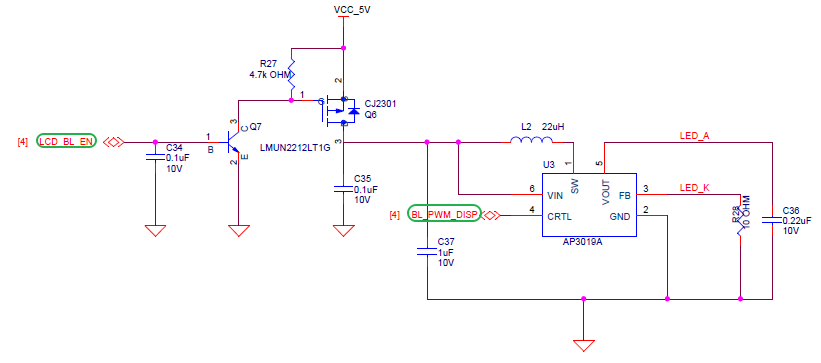
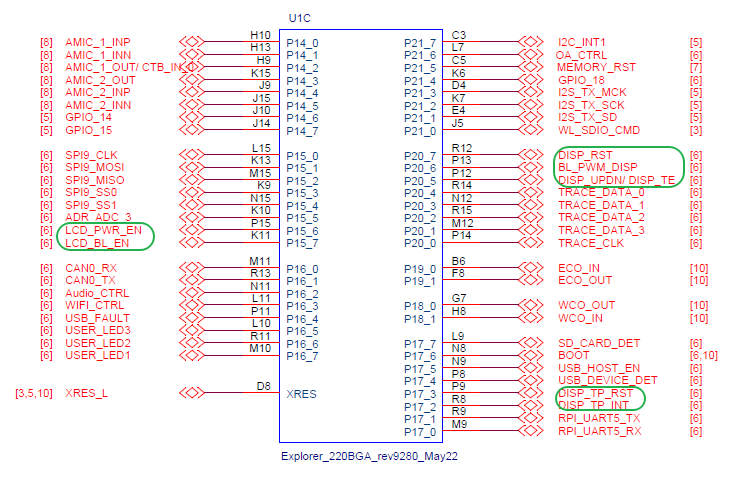
Backlight Interface
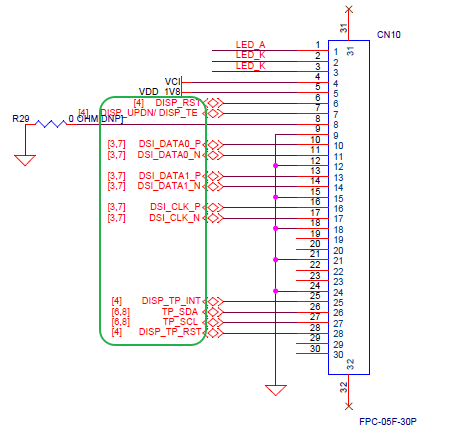
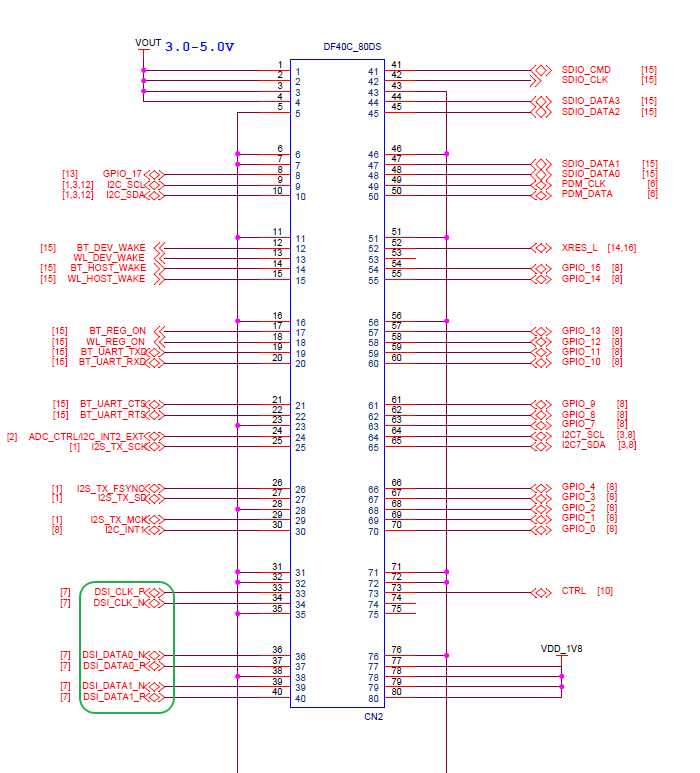
MIPI Interface
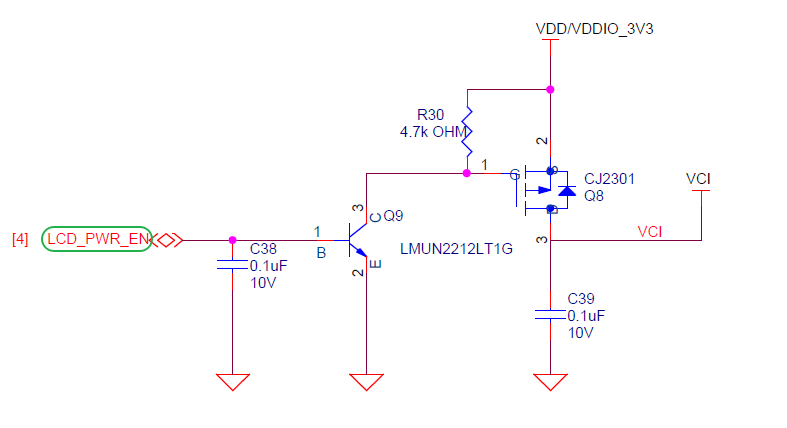
Power Interface
BTB Socket
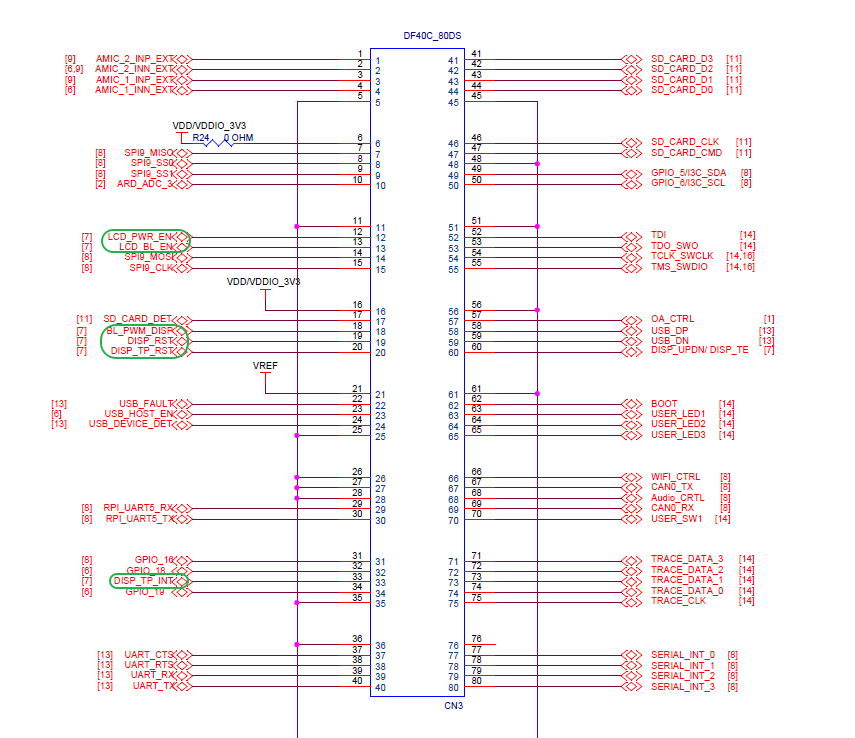
MCU Interface

Software Description
Developed on the Edgi-Talk platform, running on M55 core.
Example features:
Initialize MIPI DSI interface and LCD panel
Perform single-color fills on the LCD
Loop screen refresh to verify LCD performance
The project structure is simple, making it easy to understand the MIPI DSI initialization and LCD refresh logic.
Usage
Build and Download
Open the project and complete compilation.
Connect the board’s USB port to your PC via the onboard debugger (DAP).
Flash the compiled firmware to the board.
Running Result
After flashing and powering on, the board will run the example project.
The LCD will fill with single colors sequentially, each color held briefly.
The refresh process loops continuously. Users can adjust the refresh period or add more test patterns as needed.
Notes
To modify the graphical configuration, use the following tools:
tools/device-configurator/device-configurator.exe
libs/TARGET_APP_KIT_PSE84_EVAL_EPC2/config/design.modus
Save changes and regenerate code after editing.
If the screen shows no output, check:
MIPI DSI hardware connections
LCD power and backlight supply
Startup Sequence
+------------------+
|   Secure M33     |
|  (Secure Core)   |
+------------------+
          |
          v
+------------------+
|       M33        |
| (Non-Secure Core)|
+------------------+
          |
          v
+-------------------+
|       M55         |
| (Application Core)|
+-------------------+
⚠️ Follow this flashing order strictly; otherwise, the system may not operate correctly.
To enable M55, open the configuration in RT-Thread Settings:
Hardware --> select SOC Multi Core Mode --> Enable CM55 Core