Edgi-Talk_M33_AHT20 Example Project
中文 | English
Introduction
This example project is based on the Edgi-Talk platform and demonstrates how to drive and use the AHT20 temperature and humidity sensor. Through this project, users can quickly experience AHT20 data acquisition and processing, and view the sampled results via the serial port on the development board.
AHT10 Software Package Overview
The AHT10 software package provides basic functions for using the AHT10 temperature and humidity sensor, and also includes an optional software-based moving average filter. For more details, please refer to the README file in the AHT10 software package.
Hardware Description
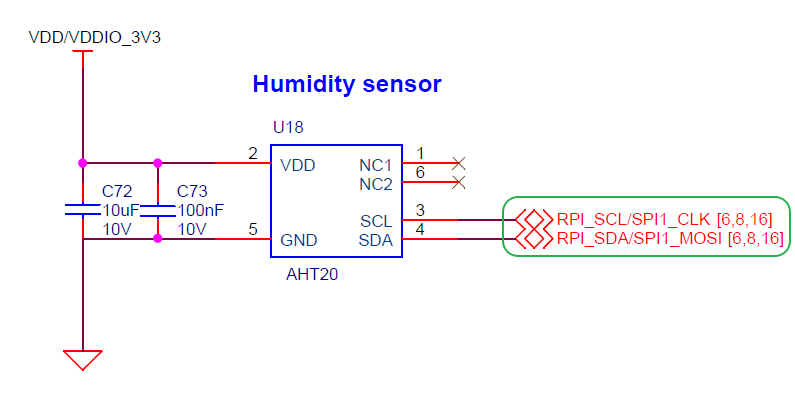
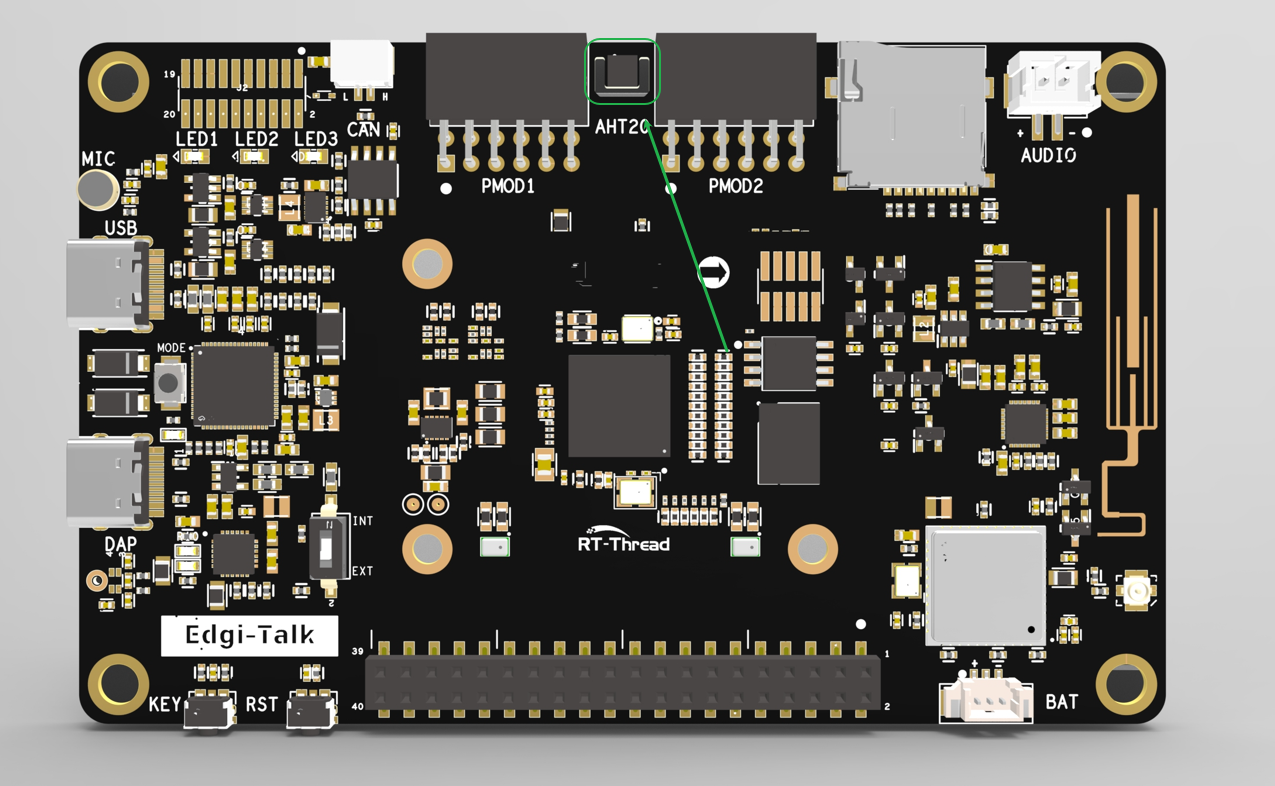
Sensor Connection Interface
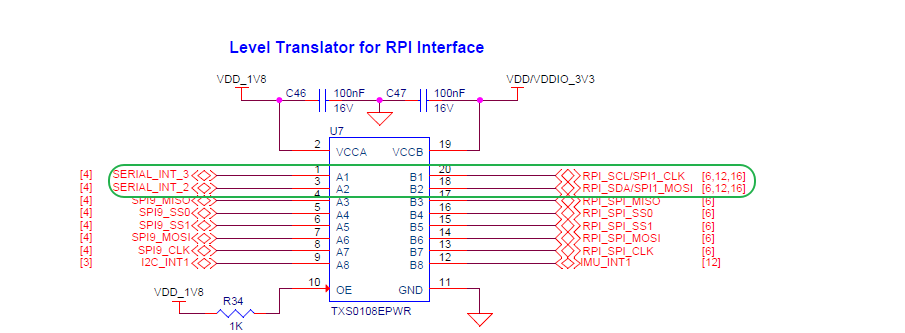
Level Shifting
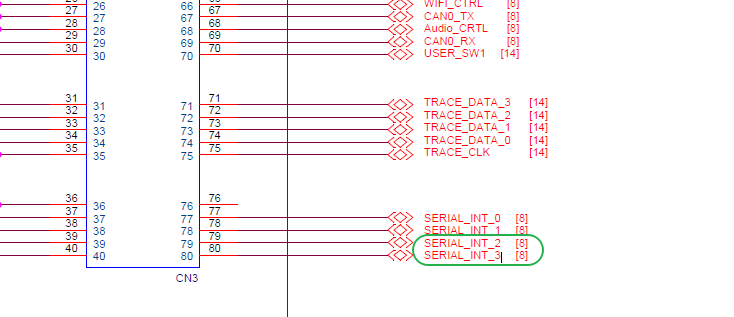
BTB Connector
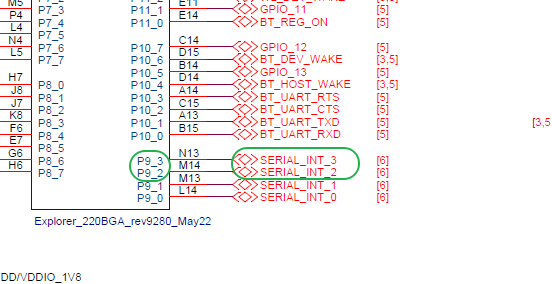
MCU Pins
Physical Board Location
Software Description
The project is developed based on the Edgi-Talk platform.
Example functionalities include:
AHT20 initialization and communication via I²C
Temperature and humidity data acquisition and parsing
Displaying sampled data via serial output
The project has a clear structure, helping users understand I²C driver usage and sensor interfacing.
Usage Instructions
Compilation and Download
Open the project and complete the compilation.
Connect the board’s USB port to the PC using the onboard debugger (DAP).
Use the programming tool to flash the generated firmware onto the development board.
Runtime Behavior
After flashing, power on the board to run the example project.
The system will initialize the AHT20 sensor and begin sampling temperature and humidity data.
The sampled data will be printed via the serial terminal, as shown below:
 \ | /
- RT -     Thread Operating System
 / | \     5.0.2 build Sep  5 2025 14:13:02
 2006 - 2022 Copyright by RT-Thread team
Hello RT-Thread
This core is cortex-m33
msh >[I/aht10] AHT10 has been initialized!
[D/aht10] Humidity   : 44.4 %
[D/aht10] Temperature: 29.7
[D/aht10] Humidity   : 44.4 %
[D/aht10] Temperature: 29.7
Notes
To modify the graphical configuration of the project, open the configuration file using the following tool:
tools/device-configurator/device-configurator.exe
libs/TARGET_APP_KIT_PSE84_EVAL_EPC2/config/design.modus
After editing, save the configuration and regenerate the code.
Boot Sequence
The system boot sequence is as follows:
+------------------+
|   Secure M33     |
|   (Secure Core)  |
+------------------+
          |
          v
+------------------+
|       M33        |
| (Non-Secure Core)|
+------------------+
          |
          v
+-------------------+
|       M55         |
| (Application Core)|
+-------------------+
⚠️ Please strictly follow the boot sequence above when flashing firmware; otherwise, the system may fail to start properly.
If the example project does not run correctly, compile and flash the Edgi-Talk_M33_S_Template project first to ensure proper initialization and core startup sequence before running this example.
To enable the M55 core, configure the M33 project as follows:
RT-Thread Settings --> Hardware --> select SOC Multi Core Mode --> Enable CM55 Core