WDT Driver Usage Instructions
English | Chinese
Introduction
This example mainly introduces how to use the WDT (Watchdog Timer) device on the EtherKit.
Hardware Description
None
Software Description
FSP Configuration Instructions
Open the FSP tool and create a new stack, selecting r_wdt.
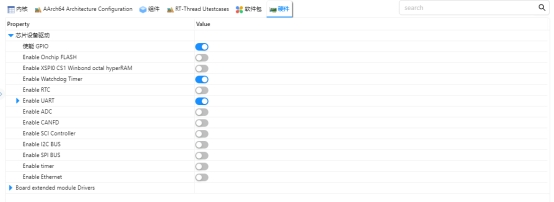
RT-Thread Settings Configuration
Example project description
By performing a watchdog operation in the idle function, we ensure that our program runs as expected.
static void idle_hook(void)
{
    /* 在空闲线程的回调函数里喂狗 */
    rt_device_control(wdg_dev, RT_DEVICE_CTRL_WDT_KEEPALIVE, NULL);
    rt_kprintf("feed the dog!\n ");
}
static int wdt_test(int argc, char *argv[])
{
    rt_err_t ret = RT_EOK;
    char device_name[RT_NAME_MAX];
    /* 判断命令行参数是否给定了设备名称 */
    if (argc == 2)
    {
        rt_strncpy(device_name, argv[1], RT_NAME_MAX);
    }
}
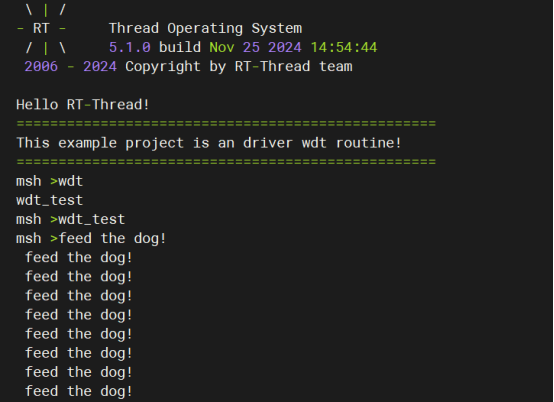
Running
Compilation & Download
RT-Thread Studio: Download the EtherKit resource package in the RT-Thread Studio package manager, then create a new project and compile it.
IAR: First, double-click mklinks.bat to generate links for the rt-thread and libraries folders; then use Env to generate the IAR project; finally, double-click project.eww to open the IAR project and compile it.
After compilation, connect the Jlink interface of the development board to the PC, and download the firmware to the development board.
Running Effects
Notes
None
References
Device and Driver: WDT Device